Want to know a weekend DIY project that is sure to make a huge impact in your home? As the weekend approaches, there’s something uniquely satisfying about rolling up your sleeves and embarking on a do-it-yourself weekend project.

BLANKET LADDER | similar COFFEE TABLE | DECOR | LAMP | SECTIONAL | OTTOMAN | similar TREE
If you’re a coffee enthusiast with a penchant for weekend DIY projects, building your own coffee table ottoman might just be the perfect option. When it comes to furnishing our homes, there’s something incredibly rewarding about creating pieces that reflect our personal style and cater to our specific needs.
This blog post will guide you through the steps of creating a functional and stylish DIY coffee table to go over your ottoman that adds all the function and comfort to your living space.
Materials Needed For A DIY Coffee Table Ottoman:
Before you dive into the your DIY project, you’ll need to gather the necessary materials listed below:
- Plywood: We chose a piece of red oak plywood, for its durability, and stain potential! shop here
- Wood Conditioner: This is a super important step, it will keep the stain from blotching. shop here
- Stain: This is up to you as far as colors are concerned, I used two as a mix. early american stain x flagstone stain
- The Ottoman Itself: In order to have the proper measurements having the ottoman on hand to measure is a must! You will want to add some space around it, but we will get to that in the meat of this post. our exact ottoman
- Saw: You could use just about any saw for this, some however will give you a better cut then others or you could decide to have the hardware store cut it down for you too. Miter Saw x Table Saw x Circular Saw
- Corner Clamps: These are super helpful to ensure everything is straight and held together. shop here
- Wood Glue: Most wood glues will work. You can find one we recommend here.
- Edge Banding: Depending on your style preference, choose legs that align with your overall design. shop here
- Polycrylic: I always use the matte poly for projects. Less sheen. shop here
- Drill: This is needed to screw the l-shape brackets Here’s our fave: shop here
- L-Shape Brackets: These are used to secure the table. Inexpensive and definitely worth it! shop here
- Measuring Tape, Scissors, and Iron: Basic tools for accurate measurements and assembly.
Whether you’re a seasoned DIY enthusiast or simply looking to infuse your weekend with a dash of ingenuity, the world of DIY projects holds endless possibilities.
Here’s A Step-by-Step Guide for Creating your own DIY Ottoman Coffee Table This Weekend:
Note: Safety should always be a priority. Ensure you’re using appropriate tools and following safety guidelines.
1. Measure and Cut the Plywood
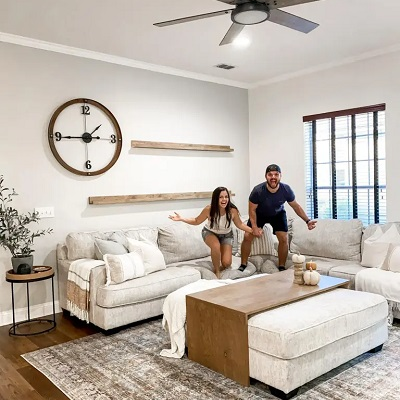
Measure the ottoman and cut the cherry oak plywood to your desired dimensions (you can also have the store cut this down for you too- makes it easier to fit in the car too). Keep in mind the height you want for your ottoman, as well as the length and width that fits your space. Here’s the specific dimensions we used for our Ashley Rawcliffe Sectional: the table top is: 26″ wide x 53.5″length and the legs are 19″ tall.
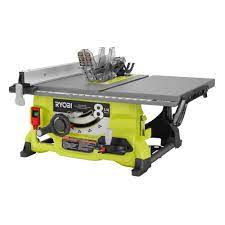
This is the saw we used. In order to cut a straight line, use something with a straight edge and clamps to hold it still and create a guide for your saw. You could also use a table saw or a miter saw for a smaller table. Here are the saws I recommend:

![]()

2. Choose Your Stain
Before committing to a stain or stain combo, test on a scrap piece of the wood you’ll be using. This allows you to see how the stain color interacts with your wood and ensures you’ll be happy with your table. Another tip: bring it into your house so that you can look at it at all times of the day with all the textiles in your space.
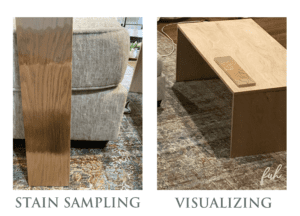 I ended up going with a stain combo since the wood has a natural red hue. I utilized a stain combination of Flagstone and Early American. Although it required several days and visits to the hardware store to achieve perfection, the patience invested was unquestionably worth the outcome!
3. Measure Twice, Cut Once
“Measure twice, cut once” says that it’s better to invest time in ensuring accurate measurements rather than rushing into cutting materials without proper verification. Taking the extra step to double-check measurements can prevent costly
mistakes, wasted materials, and the need for redoing work. Trust us, we are the king and queen of doing things twice because we are rushing or learning, creating a plan is super helpful too and will ensure you make the proper cuts before hand!
Normally you will want to give about one/ two inches or so all the way around the table, so it can easily be moved. I wanted ours a bit snug, and fortunately since our ottoman is such a great size we didn’t have to sacrifice space for our feet if the table was large. Meaning we didn’t need to move the table to keep the ottoman functional.
4. Time to Glue
Once all of the measurements are just right, you will want to use corner clamps and wood glue. You can add nails for reinforcement of the glue, but we will also be using L shaped brackets under the base for added support.
5. Attach the L-Shape Brackets & Edge Banding
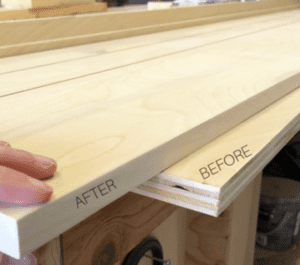
The L-shape brackets like mentioned before will serve as support for the top of your table. The edge banding is for the sides of the plywood. This makes such a difference! I promise it’s worth it to do this step! 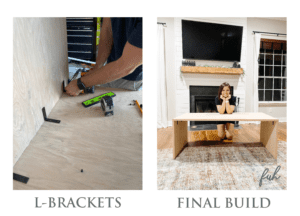
For the edge banding you will need an iron and a razor like this one that you can find in most hardware stores! If you don’t trim it the banding will break, so learn from us and cut it the first time, haha!
6. Wood Condition & Stain
Select a wood conditioner that is compatible with the type of stain you plan to use. We used a water based wood conditioner. Work in a well-ventilated area, a mask can also be helpful. Before applying the wood conditioner, sand the wood using 220-grit sandpaper. Sanding helps create a smoother surface and allows the conditioner to be absorbed more evenly. After sanding, wipe away any dust with a clean cloth. Dip a clean cloth or a brush into the wood conditioner, then apply a thin, even coat to the wood surface in the direction of the grain. I usually use an old sock or a staining sponge. They both work great!
Wood conditioner needs some time to penetrate the wood fibers and work its magic. The recommended time usually ranges around 5 to 15 minutes. After, use a clean, lint-free cloth to gently wipe off any excess wood conditioner. Wipe in the direction of the wood grain to avoid disrupting the even application. If you plan to stain the wood, wait for the recommended time specified by the wood conditioner manufacturer before applying the stain. This ensures that the wood is prepped properly for even stain absorption.
Once I’m ready to stain, I sand one more time since the wood will raise in some areas from the conditioner, with a high grit, and then get to staining! This is a tried and true technique- I promise it works!
For staining we used two different stains, I didn’t opt to mix them, I just did a light stain of Early American first and then added Flagstone over top of it. The Flagstone really helped remove any of the red/ orange hue from the cherry wood, I’d highly recommend using a gray stain of some sort to balance out the red.
7. Finishing Touches
To add your polyurethane follow these steps: Gently stir the polyurethane with a stir stick. Avoid vigorous stirring as it can introduce air bubbles into the finish. Dip a clean cloth or a high-quality brush into the polyurethane, then wipe or brush on a thin, even coat in the direction of the wood grain. Don’t apply too much product at once, as it can lead to drips and uneven drying.
Follow the manufacturer’s instructions for drying time. This usually ranges from a few hours to overnight, depending on the type of polyurethane and the humidity levels. Lightly sand the dried first coat with 220-grit sandpaper. This helps create a smoother surface and promotes adhesion for subsequent coats. After sanding, wipe away the dust with a clean, dry cloth.
Apply additional coats of polyurethane, following the same method as the first coat. Depending on your desired level of protection and finish, you may need to apply 2-3 coats. I did 2. Allow time to dry completely before sanding and applying the next coat. Wait 24-48 hours before putting anything on the table to allow it to properly cure. Then bring your masterpiece in your living room and enjoy the function.
In this blog post, we explored the necessary elements needed to construct a DIY coffee table ottoman. So, gather your materials, roll up your sleeves, and embark on this fulfilling journey of building your very own DIY coffee table ottoman.
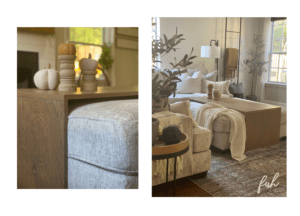
Building your own DIY coffee table ottoman is a satisfying project that combines both functionality and creativity. From selecting the right materials to customizing the design to match your decor, you’ll enjoy the process of crafting a unique piece that enhances your living space. Now you have options! You’re propping up your feet, still able to use it as extra seating, and also showcasing your decorative items. This DIY ottoman coffee table ottoman will be a conversation starter and a testament to your crafting skills.